
Zinnias are beautiful flowers that are not only outstanding in the garden, but are also easy to grow and maintain. Harvesting zinnia seeds is a simple process that allows gardeners to save their seeds for the next season and beyond. Learn how to harvest zinnia seeds, so that you can perpetuate these colorful flowers in your garden, year after year.
If you grow zinnias, consider saving some seeds from your flowers, to plant out in the garden next year. These seeds are so easy to save, and can literally fill your garden with color all season long.
I absolutely love to save zinnia seeds. From just a few blooms you can get hundreds of seeds, which can transform your garden in no time.

Open Pollinated Vs Hybrid Zinnias
Zinnia seeds harvested from your own garden will produce hybrid plants. The resulting flowers may or may not be similar to the parent plant. Sometimes they may be even more beautiful, so keep that in mind!
It’s so interesting to see what new hybrids will grow, and if they will be similar to the originals.
If you are growing open-pollinated plants, which are those which have been bred together for years for a similar look and appearance, chances are that your own harvested seeds will also produce similar flowers. Often heirloom varieties will be of this nature.
If they are not open pollinated however, the resulting plants will be more varied, and you will have more variety to choose from.
The process of harvesting zinnia seeds involves carefully selecting the right time and method for collecting the seed. By following a few simple steps, gardeners can obtain high quality seeds that will produce beautiful zinnia blooms in the coming seasons.


In this article, the important steps for harvesting and saving zinnia seeds will be discussed, including guidance on how to effectively collect and store the seeds. With a little effort and proper technique, you can become well-versed in the process of zinnia seed harvesting, and enjoy the many benefits that come with growing these delightful flowers.
When To Harvest
To harvest zinnia seeds successfully, it’s important to understand the zinnia lifecycle, and to be able to identify when the seeds have reached maturity. Mature zinnia blooms will exhibit specific traits that will help you to determine if they are ready for harvesting.

Some key characteristics to look for when identifying seed maturity include:
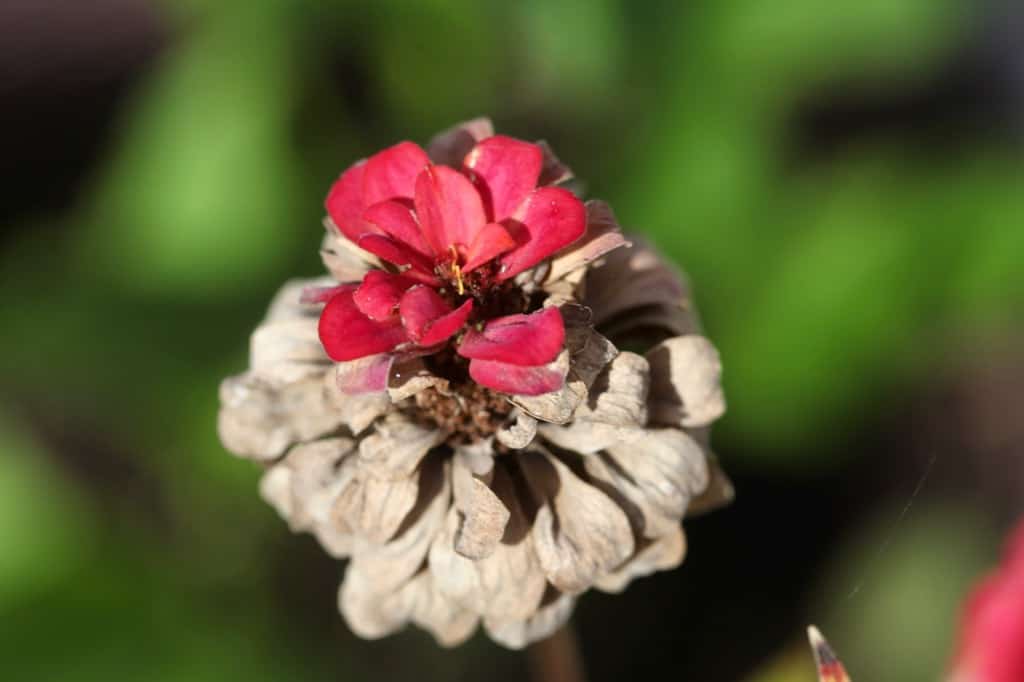
1. Petals: The petals of mature zinnia blooms will start to fade in color, and turn brittle and brown. This is a good indication that the plant has shifted it’s energy towards seed production in the flower.
2. Seed Head: The center of the flower, also known as the seed head, will change color as it matures. More visible on single petalled flowers rather than double flowers, or when the zinnia petals have fallen from the flower, this structure becomes brownish in color, and dry and brittle when mature.
3. Seeds: Although not visible on the plant while the flower head is still intact, when you are in the process of harvesting zinnia seeds, you will notice that the seeds have become dark and firm. You can pull out a petal and check the seed formation on the end, to see it’s appearance.

Where Are The Zinnia Seeds Located?
Zinnia seeds are located at the end of each petal, as well as within the dried seed head.
- Zinnia seeds look like tiny little arrow heads.
- If you pull a dried petal from the zinnia flower, at the very end of this petal you will find an arrow shaped structure attached, which is a zinnia seed. This distinctive arrow shape is typical of seeds formed at the base of the petals.
- When doing your seed collection, you will also find many thinner dark seeds within the dried seed head as well.
- Some of these seeds may not have the typical arrow shape, but rather may be crescent shaped instead. Both seed shapes however will produce beautiful zinnia flowers when sown.

Timing Of Seed Collection
The ideal time to harvest zinnia seeds greatly depends on the health of the plant, weather conditions, and regional climate. However, there are some general guidelines:
- Zinnia seeds are typically ready for harvest 4-6 weeks after the flower has started blooming. Make sure to allow the seeds to mature on the plant for viability.
- It’s best to wait until the flowers have faded and the seed heads have turned brown before harvesting.
- Zinnias bloom throughout the growing season. If you leave some flowers on the plant without harvesting or deadheading, you may be able to harvest these spent flowers for seed collection, throughout the growing season.
- Check the blooms regularly for signs of seed maturity, and track the progress throughout the growing season. Harvest the dried blooms when they are mature, as they can drop petals (and seeds) when they are fully dried.
- Avoid rainy weather. It’s always best practice to harvest seeds on a dry day, to prevent seeds from getting wet and moulding.
- Sometimes at the end of the growing season, frosts will damage zinnias at peak bloom. These flowers will then turn brown, and have the appearance of matured spent blooms. However they will likely not have viable seeds, if they have not had the proper length of time for seed development.
- Harvest your seeds from robust and healthy plants. Avoid seed collection from plants that show evidence of powdery mildew, a common fungal disease of zinnias, which can also affect seed quality.

By carefully observing the zinnia blooms and maintaining proper timing for seed collection, you can increase the chances of successful seed harvesting and enjoy a more vibrant and lively garden in the years to come.
Harvesting Techniques
The harvesting techniques for collection of zinnia seeds are fairly straight forward.
1. Materials Needed
Basic harvesting supplies consist of:
- Trays or containers for collection.
- Pair of sharp clean scissors or pruning shears.
- Label and marker for labeling the zinnia seed type

2. Cutting The Flower Heads
- To harvest zinnia seeds, it’s important to harvest mature spent zinnia flowers. These mature flowers have crispy brown petals, and seed heads that are brown.
- Using a clean pair of scissors or pruning shears, snip the flower heads off the plant, leaving an inch or two of stem attached.
- If harvesting mid season, cut deeply down the stem to promote more flower production, as zinnias are cut and come again flowers. If harvesting at the end of the season, just snip off the individual spent and mature blooms.
- Place the flower heads in a labeled container, if you are collecting more than one type of zinnia. At this stage all the brown flowers have a similar appearance, so it’s easy to get the zinnia varieties mixed up without labeling them.

3. Drying The Flowers Heads
- After cutting the flower heads, the next step is to air-dry them.
- Dry in a warm, dry, and well-ventilated area.
- Spread the zinnia heads out on a flat surface, such as a tray or cookie sheet. You can line the container with newspaper or paper towels which can help to wick away any moisture.
- Ensure that the zinnia heads are not touching each other to prevent moulding.
- The drying process can take a few days or longer. The drying process makes it easier for seed extraction.
- These dried flower heads will keep as long as you wish in this state, until you are ready to extract the seeds.

4. Extracting The Seeds
- Once the zinnia flower heads are thoroughly dried, it’s time to extract the seeds.
- The seeds can be found at the end of the petals, which are buried in the seed head. To extract them, gently pull the dried petals out of the flower head, revealing the attached seeds.
- The seeds are typically arrowhead-shaped and may have a variety of colors, depending on the flower type. You may also find a combination of viable and non viable seeds, which is normal.
- Viable seeds are hard and firm.
- If the petals have broken off leaving the seeds still within the seed head, just crumble the seed head over a plate to expose the hidden seeds and chaff.
- You may find lots of seeds inside the seed head, including both the arrow-shaped seeds from the petals, as well as smaller crescent shaped seeds.


Sorting And Cleaning The Seeds
Separating the seeds from the chaff within the zinnia seed heads can be a bit messy, however you can keep it all contained within the container that you are working on.
Separating Seeds From The Chaff
There are a number of different ways to separate the zinnia seeds from the chaff, however one of the simplest and easiest ways to separate the seeds is by doing it manually.
- Work on a large flat surface, such as a baking sheet, or on a large dinner plate.
- First pull the petals out of the flower, with the arrowhead shaped seeds attached. Break the seeds from the petals, setting the seeds aside.
- Then crumble the seed head, which easily falls apart once it’s well dried. Manually pull all the seeds away from the chaff, setting them in a pile, while pushing the chaff itself into a separate pile.
- The messy chaff is contained on your chosen work surface, and the seeds are easily separated out.
- If doing this on a larger scale, to further refine the seed and chaff separation, you can employ the winnowing technique: Lightly blow air across the mixture, and the lighter chaff should be carried away, while the heavier seeds remain.
- Make sure that your seeds are completely dry before storing them away. Consider drying the seeds for several more days on a flat surface before storage.


Choosing Healthy Seeds
It’s essential to choose healthy seeds for successful germination and future growth. Below are some guidelines to follow when selecting zinnia seeds:
1. Size: Look for seeds that are larger in size as they generally have a higher germination rate.
2. Color: Choose seeds that have a consistent brown, or greenish-brown color without any discoloration or mold. Often immature seeds will be lighter, and may have a variation in color distribution on the surface of the seed.
3. Integrity: Heathy, viable zinnia seeds will be firm and solid. Non-viable seeds are often paper-like, and can be easily bent or cracked.

Storing Zinnia Seeds
When it comes to storing zinnia seeds, proper storage conditions and containers are essential to preserve their viability. In this section, we will discuss selecting the right containers and controlling environmental conditions for optimal seed storage.
Selecting Containers
Choosing the right container for zinnia seeds storage is crucial to protect them from moisture and pests. Here are some options:
1. Glass Jars: Airtight glass jars, such as mason jars or other canning jars, are an excellent choice. Just make sure the lids are sealed properly.
2. Plastic Containers: Make sure that the seeds are completely dry before storing them in air tight plastic containers or plastic bags.
3. Paper Envelopes: By far my favorite storage container for most seeds, a paper envelope will help to prevent moulding by keeping the seeds dry, and wicking away any moisture that can be present within the seeds themselves. You can also use a brown paper bag, which makes labeling easy.

Label The Containers
- Make sure to label the seed containers with the variety of seeds that you are saving, as well as the date and year of harvest.
- The seeds will all be hybrids, and may or may not look like the parent, however open pollinated varieties will be similar, so labeling is important.
Environmental Conditions For Storage
- For best storage and seed viability, store the seeds away in a cool, dark place.
- Keep the seeds dry as well, by keeping the humidity low.
How Long Do Zinnia Seeds Last?
Zinnia seeds should last for 3 to 5 years if stored under the right conditions.
Germination rates can decrease over time, and will generally be best with fresh seed.

The Benefits Of Harvesting Zinnia Seeds
Harvesting zinnia seeds is a such a rewarding practice for gardeners for several reasons, offering both practical benefits and great personal satisfaction. Here are some reasons why you might consider harvesting seeds from your zinnias:
1. Cost Savings: By collecting your own seeds, you save money that would otherwise be spent purchasing new seeds or plants each season, therefore reducing gardening costs.
2. Sustainability: Harvesting and reusing seeds is a sustainable gardening practice, reducing the need for new resources, and minimizing waste.
3. Genetic Diversity: Saving seeds from your garden helps preserve the genetic diversity of plants, which can lead to more resilient and adaptable garden varieties.
4. Plant Adaptation: Plants grown from locally harvested seeds tend to adapt better to the specific conditions of your garden over time, potentially leading to healthier plants and more abundant blooms.
5. Personal Satisfaction: There is definitely a unique satisfaction in seeing plants grow from seeds you’ve collected yourself, creating a deeper connection to your garden, and a pride in your beautiful new plants.
6. Educational Experience: The process of collecting, storing, and replanting seeds offers a hands-on learning experience about the life cycle of plants, which is beneficial for gardeners of all ages. You get to know how the seeds grow, where to find them, and what they look like.
7. Assurance Of Quality: When you harvest your own seeds, you have more control over the quality and treatment of the seeds, ensuring they are organic if that’s your preference.
8. Selective Breeding: You can experiment with selectively saving seeds from the plants that performed best in your garden, potentially improving the characteristics of your future plants. This is an exciting endeavour that anyone can do!

Frequently Asked Questions
How Can You Tell If Zinnia Seeds Are Viable For Planting?
To determine if zinnia seeds are viable for planting, perform a simple germination test. Place a few seeds between damp paper towels, and place them in a sealed plastic bag. Store the bag in a warm, dark location.
Check the seeds regularly for signs of germination, such as sprouting roots or shoots. If a majority of the seeds germinate within 7-10 days, they are likely viable for planting.
Is It Possible To Harvest Seeds from Zinnias That Have Endured A Frost?
While it’s ideal to harvest zinnia seeds before the danger of frost occurs, you might still be able to save seeds from plants that have experienced frost. If the seed heads have dried and matured, there’s a possibility that the seeds inside are still viable.
Gently break open the seed-heads, remove the seeds, and store them in a cool, dry place until you’re ready to plant them. However, be aware that frost-damaged seeds may have a lower germination rate compared to seeds harvested before frost.
As well, if the seeds are from seed heads which have not had the time to adequately mature on the plant for 4 to 6 weeks, the seeds will likely be too immature to be viable.

What Is The Germination Time For Harvested Zinnia Seeds?
The germination time for zinnia seeds typically ranges from 5 to 14 days. Factors that affect germination time include seed freshness, soil temperature, and moisture levels. To improve germination success, sow the seeds in well-drained soil, and keep the soil moist but not waterlogged.
Providing consistent warmth (around 70-75 degrees Fahrenheit or 21-24 degrees Celsius), and placing on a heat mat can also help speed up germination.
Can Seeds Be Saved From Zinnias That Were Part Of A Flower Arrangement?
Chances are that the zinnia flowers in a flower arrangement were not at the stage where the flowers were able to produce seed.
Considering that to obtain viable seed, the flowers have to turn brown and dry on the plant after pollination, the chances of getting seeds from zinnias in a flower arrangement are not likely.
A mature flower should remain on the plant for 4 to 6 weeks for proper seed development, before the seeds will be viable.

Conclusion
Zinnias are heat loving annuals with vibrant colors. They can easily be perpetuated in the garden from year to year by the process of seed saving.
Harvesting your own zinnia seeds is a practice that enhances the gardening experience by combining practical benefits with the joys of gardening, sustainability, and community sharing.
Whether you’re looking to save money, contribute to environmental sustainability, or simply enjoy the process of watching something grow from seed to bloom, collecting zinnia seeds offers something for every gardener.
If you are doing selective breeding on some of your zinnia seedlings this process can be especially exciting and rewarding, as every harvest takes you one step closer to stabilizing your chosen variety.
Zinnias produce tons of seeds. It doesn’t take many mature seed heads to produce loads of seed for next year’s planting.
This whole process will help any gardener to maintain a continuous supply of zinnia flowers in their garden, year after year.
Consider harvesting your some of your zinnia seeds from different varieties next season.
This is especially important and exciting if you find your own unique zinnia bloom, in a sea of other zinnias. By saving these seeds you will be able to grow your own precious zinnia plants, for many seasons to come.

Have you ever tried to harvest zinnia seeds? Be sure to leave a comment below to share your experience.
Other Posts You May Like:


Pin It For Later!

Thanks so much for posting this information. I’m giving a try at saving seeds for next year and this information was very helpful.
You’re welcome! Good luck with the seed saving, it’s a fun and exciting process!
I will
I will definitely try, it sounds exciting