
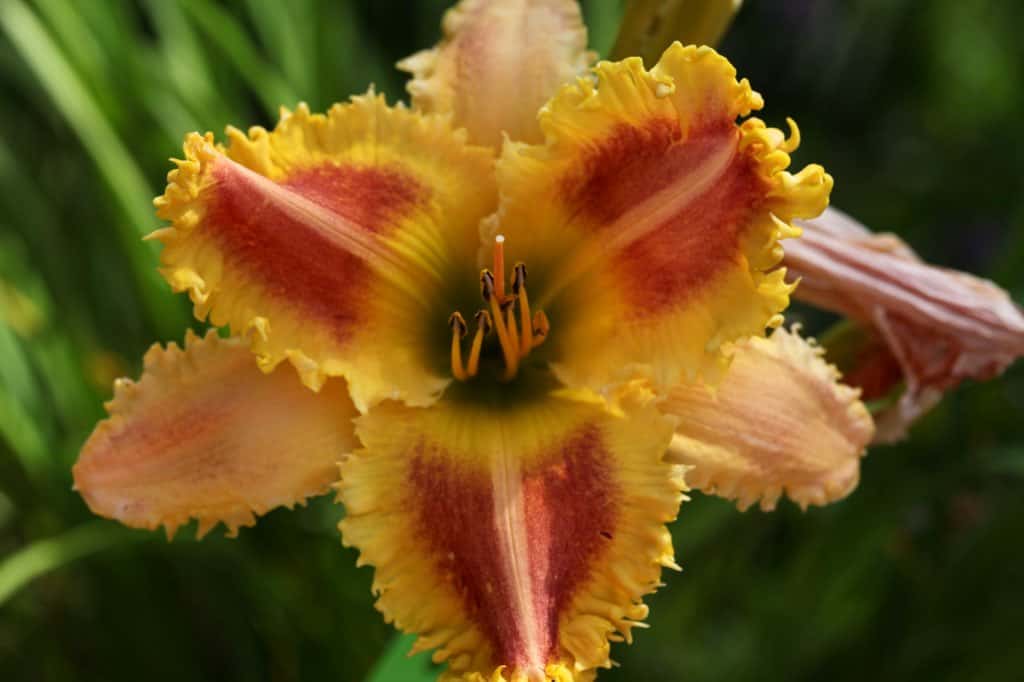
Did you know that each daylily planted from seed will become a new and unique plant? Welcome to the world of growing daylilies, where the anticipation of growing these perennials from seed is a fun and exciting adventure. Learn all about starting daylily seeds, to produce new and beautiful daylily flowers.
Starting daylilies from seed is fairly easy if you use the right techniques. It’s important to be aware of this, so that you can get the plants off to the right start from the very beginning, with germination.
In this post we will explore the process of starting daylily seeds, including stratification and planting. Please use the table of contents to skip to the section you are looking for, if you want to get right to the planting process!

Why Start Daylilies From Seed
So why should we start daylilies from seed? There are a number of reasons!
1. The joy and satisfaction of growing daylilies from scratch
Starting daylilies from seed is just so much fun! It can take a couple of years for you to see the results of your labor, however it is so well worth the wait.
Seeing those first blooms from plants nurtured from seed can be so exciting, especially if you have cross pollinated your plants with a goal in mind.

2. Cost effectiveness
Purchasing new daylily introductions can be quite costly. You can often buy seeds from those new daylily parents however, at a fraction of the cost.
Also, if you have mature daylily plants in your own garden, you can try your hand at hybridizing to produce seeds from your own chosen crosses.
3. Potential for unique hybrids and varieties
Each daylily seed will produce a new hybrid plant.
Just like snowflakes, each new daylily plant is unique. The new seedlings will be different from the parent plants, taking characteristics from each parent.
The new plants may be similar, or completely different! That’s what makes this adventure so much fun!

Understanding Daylily Seeds
Daylilies are perennials, and just like with other perennial seeds they benefit from stratification to help with the germination process. So before you start the planting process, make sure to stratify the seeds for best results.
Be careful however with the type of stratification that you provide, as daylily seeds do not do well with freezing. Choose a stratification method that does not expose the seeds to frost.
I love to winter sow most perennial seeds, however skip this method of seed sowing for daylilies.
Winter sowing outdoors is not an option for daylilies in climates where the soil freezes through the winter. From my experience, when daylily seeds freeze, they are not likely to survive, and most often just end up turning to mush.
To stratify your daylily seeds, they will require a cool chill period in the fridge before planting. Approximately 3 to 4 weeks is a substantial time frame for stratifying.
After this chill period, the seeds are ready to plant.
I like to plant my daylily seeds 6 to 8 weeks before my last frost date, and make sure to provide the stratification period before this.

Materials Needed To Start Your Seeds
For stratification:
- baggies and vermiculite (you can also use paper towel)
For planting:
- deep planting containers, such as solo cups for good depth
- seed starting mix
- labels and markers
- water
- daylily seeds

Step By Step Guide To Starting Daylily Seeds
1. Preparation of Seeds
Cool chill
One of the easiest ways to prepare the seeds for germination is to place them inside a plastic baggie, and set them in the fridge. After the 3 week exposure to cold temperatures, the seeds will more readily germinate when planted.
Cool moist chill
Another method for stratifying the seeds is to provide not only cold temperatures, but moisture as well. This is accomplished by placing the seeds into moist vermiculite in a baggie, and then refrigerating, again for the same time frame.
Seeds that receive a cool moist chill will often sprout in the fridge. If they don’t germinate there, the seeds will generally begin to sprout once removed from the cool environment. This is a great method for pre sprouting seeds, so that you don’t end up planting duds.

Pre-sprout in moist paper towel
Pre-sprouting in moist paper towel is also a technique I’ve used on daylily seeds in the past, after the initial chill period. It’s fun to see your seeds begin to wake up and grow, just prior to planting.

Using hydrogen peroxide
Some daylily growers soak their seeds in a hydrogen peroxide mixture to provide further scarification. I personally haven’t used this method, and prefer the cool chill in moist vermiculite the best.

2. Soil and Container Preparation
Daylily seedlings like lots of room for their roots to grow. Using deep cups like solo cups are a great option for this reason.
If you are using cups, be sure to punch some drainage hole in the bottom of each cup.
Fill with a moist seed starting mix.

3. Planting the Seeds
I like to plant my daylily seeds indoors, to give them a head start before planting out in spring.
You can however plant the seeds when the weather warms up outdoors as well, and keep them somewhat protected, such as in a greenhouse environment, until they are a good planting size.
When planting intact seeds that have not sprouted, make a small hole approximately 1/4 inch deep, plant a seed, and cover with soil. It’s as simple as that.
I will often plant two or three seeds per cup, and then separate the seedlings at planting time.
If the seeds have germinated prior to planting, take care and be gentle with the root tip at this stage to avoid injury during planting. I will often use a pencil to make a deep hole into which to sink these roots.
Plant the sprouted seeds root side down and sprouting tip up. Firm the soil down gently after planting, and water in.

4. Provide Optimal Growing Conditions
Provide a sunny location for the new daylily seedlings to grow. A sunny windowsill can work, however if you have lots of seedlings consider a shelving unit with a grow light if growing indoors.
Keep the soil moist until the daylily seedlings have sprouted. Do not allow the soil to dry out at this time. Once sprouted, water as needed, allowing the soil surface to dry out slightly between waterings.

Trouble Shooting Common Issues
When starting daylily seeds indoors, it is common to run into issues with the newly planted seeds and seedlings. Some of these issues include:
1. Mold or Fungus on the Soil
Mold can grow on top of the soil in less than ideal conditions. Excessive moisture and poor air circulation can contribute to this issue.
With very young seedlings this can contribute to “damping off”, a fungal disease that can kill the plants.
Prevent growth of mold by allowing the soil to dry slightly between waterings, once the seedlings have germinated. Avoid overwatering and ensure the seed containers have proper drainage.
Increase air circulation by placing a fan nearby or opening a window. If mold appears, gently scrape off the moldy soil, and sprinkle cinnamon powder on the surface as a natural fungicide.
Also, be sure to use sterile soil and planting containers to prevent fungal infections.
2. Seedlings Damping Off
Sometimes damping off occurs despite best intentions. You will find that these seedlings develop damaged stems right at the base where the stems meet the soil line.
These young plants often fall over flat against the soil, as the stems wither and shrink.
If damping off occurs, remove affected seedlings immediately to prevent the spread to healthy plants.
3. Poor Germination
Poor germination can occur if using old seeds, those not stored properly, or insufficient warmth during germination.
As well, seeds that have not received proper stratification may not germinate easily.
Always use fresh seeds and store them in a cool, dry place. Ensure the germination area is warm enough (around 70-75°F). Consider using a heat mat if room temperatures are too low.

Transplanting The Seedlings
When daylily seedlings have been growing for about 6 to 8 weeks, they can be planted out, as long as conditions are optimal.
When To Transplant
Transplant your daylily seedlings into the garden after the risk of frost has passed. You can check the Farmers Almanac for your last frost date.
Make sure to harden off the seedlings if they have been growing inside, or in a protected area such as a greenhouse. This will help to toughen up the young plants, and prepare them for life in the garden.
Growing Conditions
- Sunlight: Daylilies thrive in full sun, and should be planted in an area that has at least six hours of direct sunlight daily. The more sun they receive, the better the flowering potential.
- Soil: While daylilies are adaptable to many soil types, they perform best in slightly acidic to neutral soil (pH 6.0 to 7.0). Make sure the soil is well-draining, and incorporate lots of organic matter to boost fertility and drainage.
- Watering: Regular watering is important, especially during the growing season and dry spells. Daylilies benefit from about 1 inch of water per week, whether from rainfall or manual watering.
- Temperature: Daylilies are hardy in USDA zones 3 through 9, showing good tolerance across a wide range of temperatures. Some varieties however do better in different climates, such as evergreen daylilies in warmer climates, and dormant daylilies in colder locations.

Spacing and Planting
When transplanting multiple seedlings, be sure to space them accordingly. I like to space the plants 18-24 inches apart, to allow for growth and expansion of the clumps as they mature.
If you have been growing multiple seedlings per container, they are easy to separate at transplanting time.
Planting depth is important. Plant the crown (the part where the roots meet the stems) about 1 inch below the soil surface.
It may take several years before you see the first blooms, however it is well with the wait! And if you plant some new seedlings every year, eventually you can anticipate new blooms every season!

In Summary
Starting daylilies from seeds can be such a gratifying experience. It also adds beauty and variety to your garden.
Remember, patience and care are key, but the reward of seeing your daylilies grow and reveal themselves is so worth the effort.
In no time at all, and with just a bit of patience, you can fill your garden with lots of beautiful home grown daylily seedlings.
The anticipation of your new blooms can be exciting, and so rewarding. I encourage you to start some daylilies from seed this season. It will certainly become a new gardening adventure!

Have you ever tried started daylilies from seed? Be sure to leave a comment below to share your experience!
Other Posts You May Like:


PIN It For Later!

Leave a Reply